Pages

Thursday, March 22, 2012

Pop of Neon...and Leopard


 Remember how in another post I talked about a pop of neon?  Well this is my kind of a pop of neon!  I just like to add a tiny bit of neon and here it is in my belt! Can you believe it was only $1.50 from Forever 21?
While we are talking about pops of color, what about my pop of leopard on my feet. These are my favorite shoes right now!


This is me on my way to the bus stop.

My belt is too big so I just kinda wrapped it a bit to fit!

I love these shoes!


Love Ruby xo

Sunday, March 11, 2012

Roller Skate Rescue......

         My awesome mum got me a cool pair of roller skates at the thrift store.  The only problem was they were a little boring.  So I decided to make them look way better by adding some simple things!!!!

Here is what you need.
Roller skates
Glitter
Hot glue gun
Neon paint ( love Decoart Americana neon paint in Sizzling Pink)
Blue painters tape
Felt
Paint brushes

This is the before...Kinda boring right?

Use blue painters tape to mark the areas you want to paint.


I used Decoart Americana paint in Sizzling Pink.


Dab the paint on the area and let it dry

I don't love the writing and wanted to cover it up.


Trace a heart onto felt


Draw a heart inside the heart
Cut it out


I use tacky glue


Paint the glue in the little heart

Add any colored glitter, I liked the pink!

This is how it should look

Hot glue the heart over the words

How cute are these!!


Love Ruby xo

Friday, March 9, 2012

Fabric circle necklace tutorial


This necklace is really easy to make and would make a fun gift for your bestie.


Photo by Kristen Gardner Photography


Here is what you need
Sewing machine
Scissors
Disappearing ink marker
Scraps of fun fabric
Stiff interfacing
24 inches of ribbon
bottle cap or something else circular to trace. I used a medicine bottle cap (ask mom first)

Step 1
Trace 20 circles onto all different cotton fabrics. I cut 2 circles of each fabric.


Step 2
Trace 10 circles on a piece of stiff interfacing


Step 3
Cut everything out


Step 4
Place one piece of interfacing between 2 pieces of fabric, kind of like a sandwich.


Step 5
Sew 6 lines on the circle in a snowflake type pattern. It doesn’t have to be super neat so don’t worry.


Step 6
It should look like this


Step 7
Trim around each sewn circle so it looks nice and neat


Step 8
When you have sewn them all, lay them out how you want them to look


Step 9
Sew the circles in a row, as you sew across one, quickly put the next one under the machine and keep sewing. Go back and forth a couple of times so it is really secure.


Step 10
Do this with the other rows . Its really easy!


Step 11
It should look like this


Step 12
Cut your ribbon into two 12 inch pieces. Sew each one onto the back of the two top circles


Step 13
Cut all the annoying threads
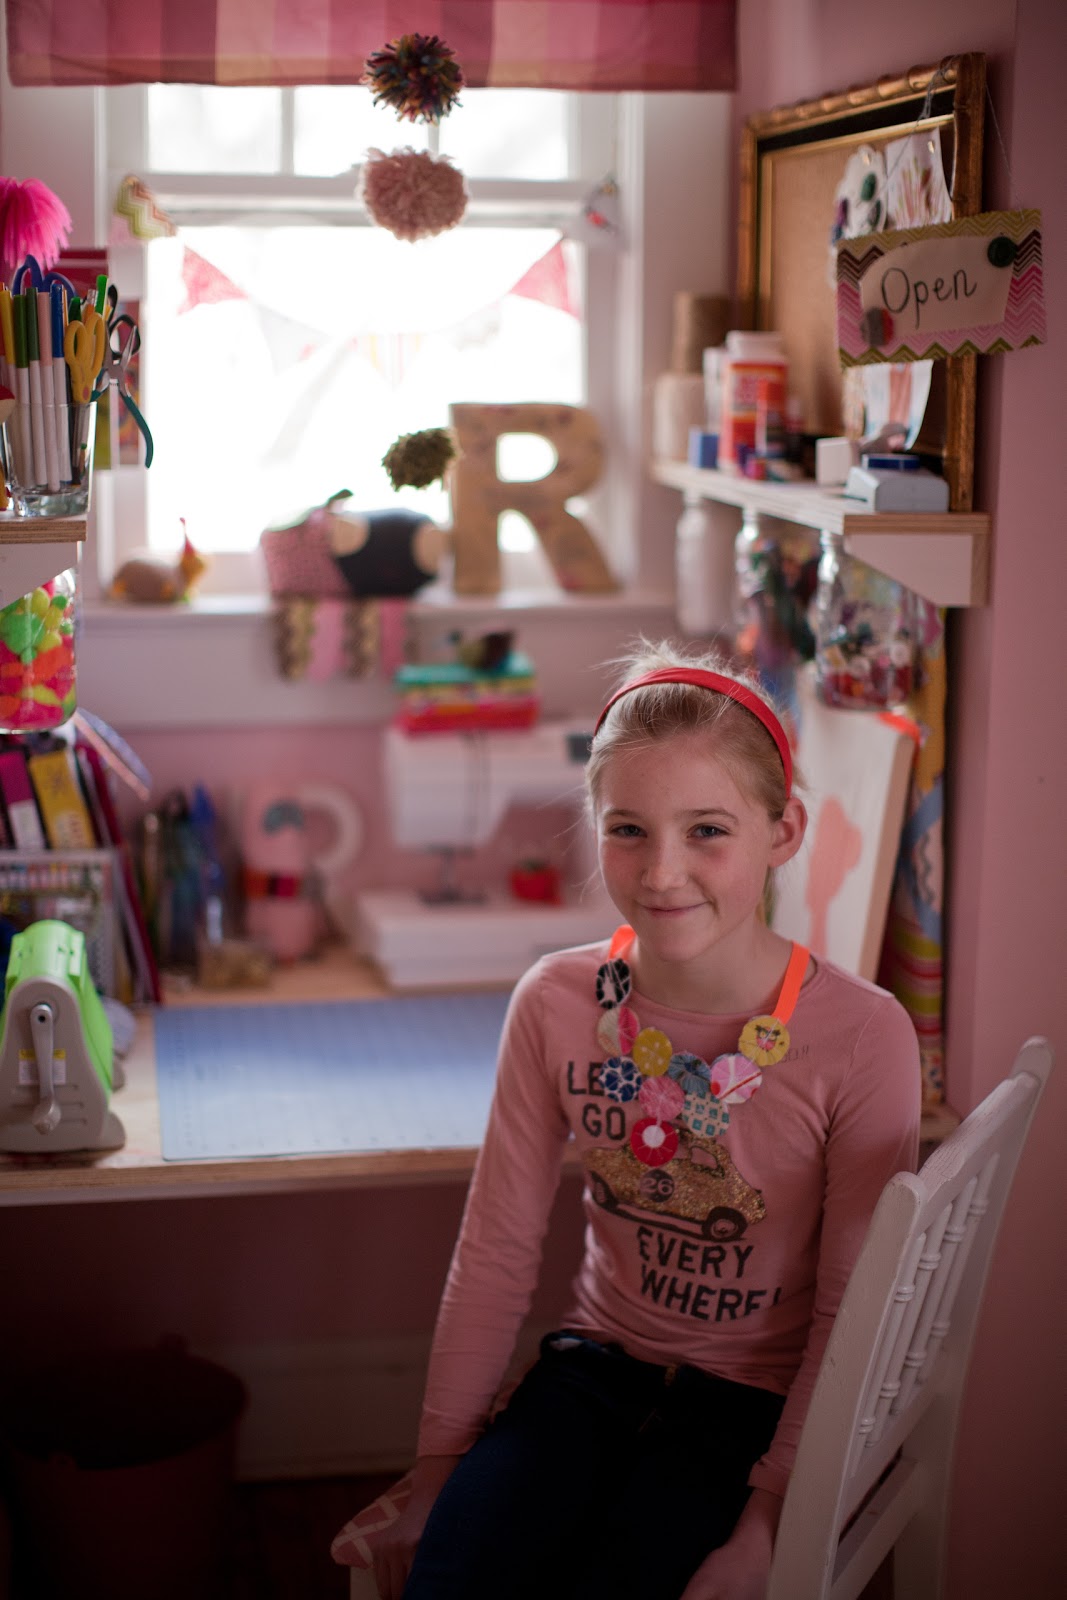


All done!!!


Love Ruby xo


Thursday, March 8, 2012

Sewn Jewelry...


This is the necklace I made last week, what do you think?


Love Ruby xo


Thursday, March 1, 2012

Polka dot shoe DIY


I see Polka dots everywhere I go. It seems that every store I go into has loads of Polka dots for Spring.
I have always wanted a pair of  Polka dot ballet flats so here is a wonderful and inexpensive way to add them to your boring pair of shoes!


You need a water soluble white pencil and a white fabric paint pen


and a cheap pair of ballet flats. Mine were $10.


Use the chalk pencil to mark the circles


Carefully color in the circles with the paint pen.


Oh my gosh, Don't you just love them!!


Love Ruby xo


Related Posts Plugin for WordPress, Blogger...